L400 fuel filter replacement questions; or, why does Mitsubishi hate us?

Foundmine

Member
I'm replacing my fuel filter as it is time for my second oil change since I purchased my van a little under a year ago. My van is a '96 L400 Exceed, and its got a dual battery setup that looks stock. I was able to get the batteries out without removing the intercooler, and I had hoped that the fuel filter would then be accessible. Unfortunately, it looks caged in by the hard/soft fuel lines and the filler neck (or what I hope is only the filler neck) for the window washer fluid. Also, the expansion tank looks really close to the washer fluid filler neck, and might be in the way even if I get the filler neck out. Questions below:
  1. How much more of this crap these performance mini-van parts do I need to remove for a wear item that needs to be replaced every other oil change? Just the rubber fuel lines? Removal looks tight even if I get those off. Does the washer fluid filler neck come out easily? Or is it attached to the washer fluid reservoir?
  2. My rubber fuel lines are pretty rigid, and each is encased in a clear plastic sleeve that feels a little brittle. Does this sound like OEM parts? The "clear" plastic is a little discolored and a little brittle, but not that bad. It's not new, but it doesn't feel like 25+ year old plastic. If I am going to replace the fuel lines, what should I use (lines rated for pressure or not?) and should I get some oversized clear PVC to protect the lines?
  3. Before I go destroying 25+ year old plastic bits, does the water separator just twist off?
  4. If I introduce air into every part of the system, as I assume I will, will button pump on the top of the filter housing be sufficient to prime/purge the system after I put everything back together, or do I have to prime the system with the injector side of the fuel lines disconnected?
  5. Are you guys really doing this every other oil change? Or did I misread a maintenance schedule somewhere?
I swear I searched for answer before posting, but as penance for asking a basic maintenance question I will follow up with anything I learn.
 
1. IDK, sorry...
2. Sounds like original; I would replace w/ new rubber lines (I didn't install sleeves).
3. Yes... the manual has you put it in a bench vise and twist the filter off with both hands.
4. I have replaced the fuel filter/hoses and only reprimed to the point of disconnect (IP inlet). Just changing the filter I would only reprime that (unless it proved to be insufficient).
5. The maintenance schedule for the 4D56 (D4BF) is every 60k km/3yrs (inspect at 30k/18mo, replace at 30/18 if using low quality fuel); I can't imagine that it would be any more frequent than that for a more modern engine/system (I have not seen anything officially documented for the 4M40).
 
Excellent, thanks. I've included photos below for reference in case anyone else needs them, or is thinking of doing a filter change and want to see the scope of the project first.

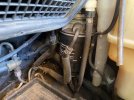
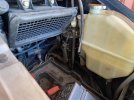
IMG_0255.jpgIMG_0256.jpg
 
For removal, unbolt the filter and housing in one piece. (Two bolts accessed with extension and wobble socket) Of course, carefully remove the fuel hoses; If you want to replace them, belmetric sells metric fuel hoses.
 
Also, yeah, the L400 is harder to service than the L300, but on the upside you get airbag(s) and crumple zones that don't amputate your legs.
This is one of the first "overland" builds that I am doing that in a vehicle that won't amputate my legs in the case of a collision, so the benefit is still a novel idea to be.
 
Maybe some of this information might help as well:

I ended up relocating mine, mainly due to the fact that I do have a dual battery setup as well and wanted to make it easier to change out. I also list in there a few bits that are helpful, like the water sensor wrench you can pickup so you don’t end up breaking the sensor or something when tightening it to the new filter. The fuel lines I used I got from Napa Fuel Vapor Hose (H176) 5/16” 7.9mm and it works great, no leaks and I used the OEM fuel line clamps (would have preferred new ones, but made the ones I had work).

As far as the fuel line being wrapped you can pickup something like this (https://a.co/d/5ZO43qL) to protect the line against heat.

To purge air from changing the fuel filter there is a 10mm nut that you back off and then pump the primer until you only get fuel coming out and no bubbles, would highly recommend lots of paper towels around the bleed screw since fuel can slip down into the top of the fuel filter and get stuck in there.
 
Finished, with moderate success! Many thanks for the advice and the answers to my simple questions. My take aways were:
  1. The entire filter house must come off, at least in my van's configuration. This is what caused my initial post, as I couldn't fathom how to get the filter off/out without removing a bunch of components. It was fairly easy, but looks a little intimidating - only 2x 12mm nuts.
  2. The fuel hoses must come off. This was another mental stumbling block as I was trying to figure out how to remove the filter without removing the hoses.
  3. The wiper fluid filler neck and the coolant expansion tank can stay mounted, but they reduce the access to the two nuts securing the filter assembly.
  4. If in the US, and using parts from a store like NAPA/Orielly's/Autozone, 5/16 fuel hose is the closest fit for both lines going to and from the filter. I tried 3/8s, thinking "bigger hose = mo' power baby" but the seal between the hose and the hard line was obviously poor. I don't know if the seal under the clamp was complete, it may have been complete, but when I couldn't get the pump to prime the first time swapped out the hoses for the smaller size to eliminate that as a failure point.
My remaining questions:
  1. My pump didn't prime. I tried four times, depressing the hand pump 50+ times each attempt, but to no avail. I could hear air moving out the banjo bolt but nothing else. Also, I didn't notice resistance when i tightened the banjo bolt and tried pumping. The van fired up on the first crank but had a momentary hiccup in idle about 20 seconds after starting, which I assume was due to the filter filling and some air moving through the system. Is it likely that my fuel filter assembly will fail while in use between now and the next filter change, or does this failure only affect the priming mechanism? I'd rather not be stranded in a desert.
  2. On other diesels I have owned, mostly big 7.3L Fords, I have been able to look at the fuel filter after initial startup to check for leaks. The Delica's is pretty well hidden after the dual battery setup is replaced. Any tips for looking for fuel leaks? Is there a place where they often show themselves?
Overall, great success, and good first/small mechanical project on the van. Everything came apart, everything went back together, and I found another spare part to buy (filter assembly).
 
Is it likely that my fuel filter assembly will fail while in use between now and the next filter change, or does this failure only affect the priming mechanism?
A failed primer is also often the source of an air leak allowing air into the fuel system; resulting in poor starting/running.

But it sounds to me like it was just pulling from the path of least resistance (air at the IP banjo) because the filter wasn't filled first or primed at the bleeder. If the filter is empty you might have to bleed it like you bleed brakes (close the bleeder/line for the vacuum stage) in order to get it to pull fuel uphill.
Understood. Many thanks. I am going to assume that the filter assembly is working correctly and take it off my immediate list of integral wear items and parts to replace. I was wondering how the primer overcame the open bleeder valve, and I assumed it was just some engineering wizardry. I now see that common sense mechanics wins the day again.
 
  1. Are you guys really doing this every other oil change? Or did I misread a maintenance schedule somewhere?
I swear I searched for answer before posting, but as penance for asking a basic maintenance question I will follow up with anything I learn.

I personally replaced my fuel filter after 30,000 kms.
I *DO* replace the oil filter with every change (nearly) but certainly not the fuel filter. This is also why I am going to relocate my oil filter - I want to switch to a more common and less expensive filter.
 
I'm in the process of changing my fuel filter while doing the injector pump seals.
It was so tight I had to put the bracket in a vice and use stillsons on the filter!
From the colour of the diesel that came out, I don't think it had ever been changed.
 
Hey guys - have had my (new) '95 L400 for about a week now...was dry as a bone but now the fabled diesel fuel leak. For the life of me I can't detect where it's coming from. Will post about it w/ pictures - maybe a new thread. Ugh...
 
Hey guys - have had my (new) '95 L400 for about a week now...was dry as a bone but now the fabled diesel fuel leak. For the life of me I can't detect where it's coming from. Will post about it w/ pictures - maybe a new thread. Ugh...
A really common leak is the seals on the fuel pump.
 
Thx Mr. Flbble - this might sound lame, but for the life of me...I can't find that fuel pump...where is it (round about)?
BTW - i've got the same model as you, just not the Royal trim line.
 
Thx Mr. Flbble - this might sound lame, but for the life of me...I can't find that fuel pump...where is it (round about)?
BTW - i've got the same model as you, just not the Royal trim line.

Remove the 4 10 mm bolts on the intercooler - you will be doing this a lot. You pretty much need to remove these each time you work on the engine.

The pump should be under the intercooler between the engine block and the battery.

This guy points to where it was:


I have that video to hand because I had to reference it when doing my starter.
 
Top